

Last updated November 12, 2026.
Quick answer: To skin a deer, hang it from its hind legs on a gambrel, cut through the hide around each hind leg just below the hock, then slice up the inside of each leg to the field-dressing opening. Peel the hide down the body by hand, using your knife only where it sticks, cut the front legs free the same way, and remove the hide at the neck. Skin it as soon as you can after the kill, while the deer is still warm, and keep the meat clean and cool.
Hey, there fellow hunters! Did you know that your hunting trip doesn’t actually end after you’ve successfully taken down your deer?
Nope, the real work begins as soon as you start field dressing and skinning your deer to get it ready for processing. So roll up your sleeves, grab your skinning knife and get to work. The reward, a freezer full of venison, is worth every minute.
Skinning can look like a daunting job the first time, but with the right tools and a simple order of cuts it goes faster than you’d think. Here’s our step-by-step method for skinning a deer so you save all of that venison, and the hide too if you want it.

What you need to skin a deer

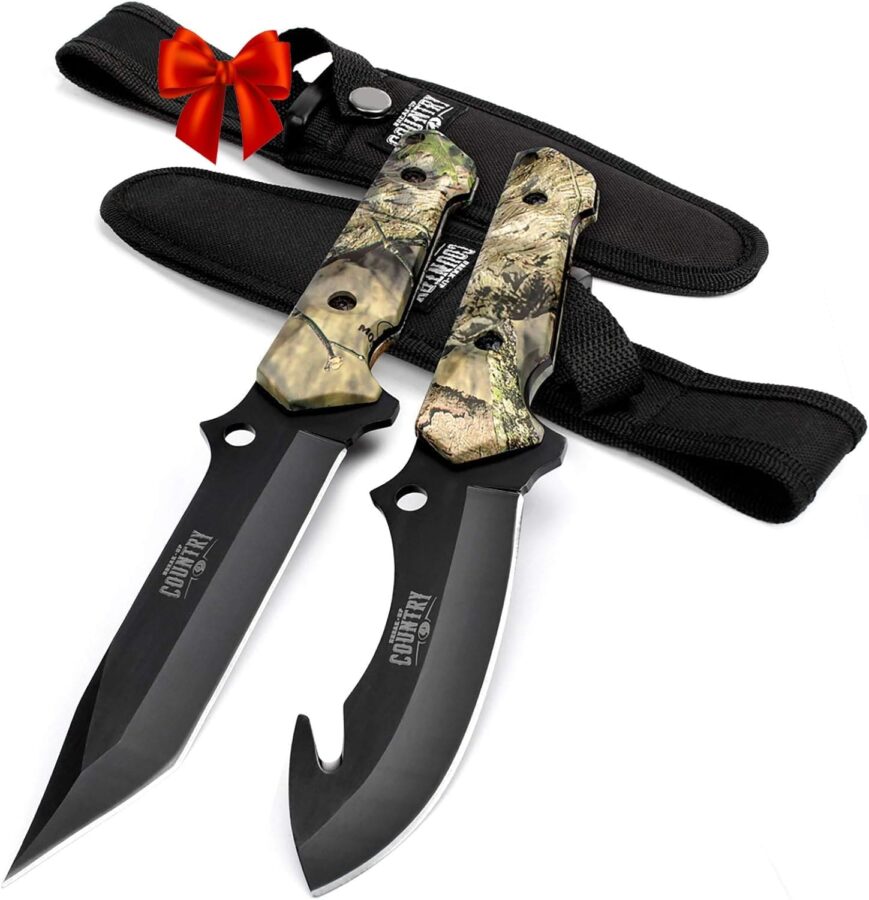
- A sharp skinning knife. A fixed blade with a rounded or drop point is easiest to control.
- A gut-hook blade (optional) for opening the hide without nicking the meat.
- A gambrel and a rope or hoist to hang the deer by its hind legs.
- A bone saw or a sturdy knife for the lower legs and head.
- Gloves, paper towels or a damp rag, and a cooler or clean bags for the meat.
A two-blade set covers most of this list. The Mossy Oak fixed blade hunting knife set pairs a straight-edge blade with a gut-hook blade, and it’s one of our picks in the 5 best hunting knives for the 2026 season.
Step 1: Hang Up the Deer

Hang the deer from its rear legs as soon as you can after the kill. Push the ends of a gambrel through the gap between the bone and the large tendon just above each hock, then hoist the deer until its head is just off the ground. Some hunters set up a pulley system in the garage or a covered outdoor area, especially for a big buck. Hanging lets the carcass drain and cool, and it puts the hide at a comfortable working height.
Step 2: Utilize a Sharp Knife
Use a knife made for skinning and make sure it’s sharp before you start. A sharp blade separates hide from meat cleanly, while a dull one tears the hide and pulls meat off with it. Keep a sharpener nearby and touch up the edge as you go. Whenever you cut through the hide, slide the blade underneath with the edge facing out so you cut from the inside. That keeps hair off the meat.
Step 3: Dismantle the Legs Before Skinning
Find the joint below each hock, where the lower leg meets the rest of the leg. Cut through the hide in a ring all the way around the leg, just below the gambrel. Then cut the lower leg off at the joint, either with a saw or by cutting through the tendons and snapping it, using your knee for leverage. Do the same on the front legs, just below the “knee” joint.
Step 4: Make Your Leg Cuts

From the ring cut on each hind leg, slice the hide up the inside of the leg to the opening you made when field dressing. Keep the blade under the hide with the edge facing out. Do the same up the inside of each front leg to the center of the chest. These cuts are your starting points for peeling the hide.
Step 5: Stripping Off the Hide

Start at the hind legs. Grab the loose edge of the hide and pull it down and away from the meat. It peels off like a pair of tight wet jeans. Where the hide sticks, use your knife in short strokes against the hide, not the meat.
- The tail: Peel the hide down to the base of the tail, then cut through the tail bone so it stays attached to the hide.
- The back and sides: Work your fist between the hide and the meat and push down. This separates the hide quickly with less knife work.
- The shoulders: Keep pulling the hide down over the shoulders, then free each front leg from the hide.
Step 6: Remove the Hide at the Neck
Peel the hide down the neck as far as you can. Cut around the neck through the hide, then remove the head at the first joint of the spine with a saw or knife. If you want a shoulder mount, stop and leave the cape on the deer. Caping takes different cuts, and most taxidermists would rather do it themselves.
Step 7: Clean Up and Keep the Meat Cool
Trim away any bloodshot meat, pick off stray hair, and wipe the carcass down with a damp cloth or paper towels. Keep the meat cold. If the air temperature is above about 40°F, quarter the deer and get it into a cooler with ice or a refrigerator soon. If it’s cold enough, you can let it hang for a few days before butchering.
Planning to process deer at home every season? Our guide to building your own home butchering station shows how to set up a space that makes skinning and butchering much easier.
How to save the hide

If you want to keep the hide for tanning, scrape off any remaining fat and meat, then cover the flesh side with a thick layer of non-iodized salt. Fold it flesh side in, keep it cool and get it to a tannery as soon as you can. Many tanneries will also trade hides for credit toward finished leather or gloves.
Skin it yourself or take it to a processor?
Skinning a deer isn’t for everyone, and that’s okay! If you’d rather not do it yourself, most deer processors will skin, quarter and butcher your deer for a fee. Professional butchers know exactly how to skin a deer and cut the meat, so you still get to enjoy your venison, and keep the hide if you want it. Call ahead during the season, because many processors fill up fast around the firearms opener.
Common skinning mistakes to avoid
- Cutting from the outside in. It drags hair into the meat. Cut from under the hide, edge out.
- Waiting too long. A cold, stiff carcass is much harder to skin.
- Using a dull knife. It tears the hide and wastes meat.
- Letting the meat get warm. Skin and cool the carcass promptly in warm weather.
Frequently asked questions
Should you skin a deer warm or cold?
Warm is easier. The hide pulls away from the meat much more easily in the first few hours after the kill. Once the carcass cools and stiffens, the hide sticks and you’ll need your knife more often.
Do you hang a deer head up or head down to skin it?
Both work. Most hunters skin head down, hanging from the hind legs on a gambrel, because the hide peels downward with gravity and the front shoulders come off last. Head-up hanging is common when you plan to cape the deer for a shoulder mount.
Do you field dress a deer before skinning it?
Yes. Field dress the deer first, in the field, to remove the internal organs and start cooling the carcass. Skinning comes after you get it home or to camp and hang it.
What knife do you need to skin a deer?
A sharp fixed-blade skinning knife with a rounded or drop-point blade is the main tool. A gut-hook blade helps open the hide without cutting into the meat, and a bone saw or sturdy knife handles the head and lower legs.
How do you keep hair off the meat when skinning?
Cut from under the hide with the blade edge facing outward, so you slice through the skin from the inside instead of pushing hair into the meat. Keep a damp towel handy to wipe off stray hair as you go.
Can I take my deer to a processor without skinning it?
Yes. Most deer processors will skin, quarter and butcher your deer for a fee. Call ahead during the season, since many fill up fast around the firearms opener.